

Not everything goes according to plan. And it became one of those weeks where every time I turned around some impediment thwarted my success.
Backstory
We scavenged a free truck camper from Craigslist because it contained several appliances that we can use on our skoolie conversion. Although I felt most excited about the propane fridge, the furnace appeared rather attractive as well. Julie likes being warm!
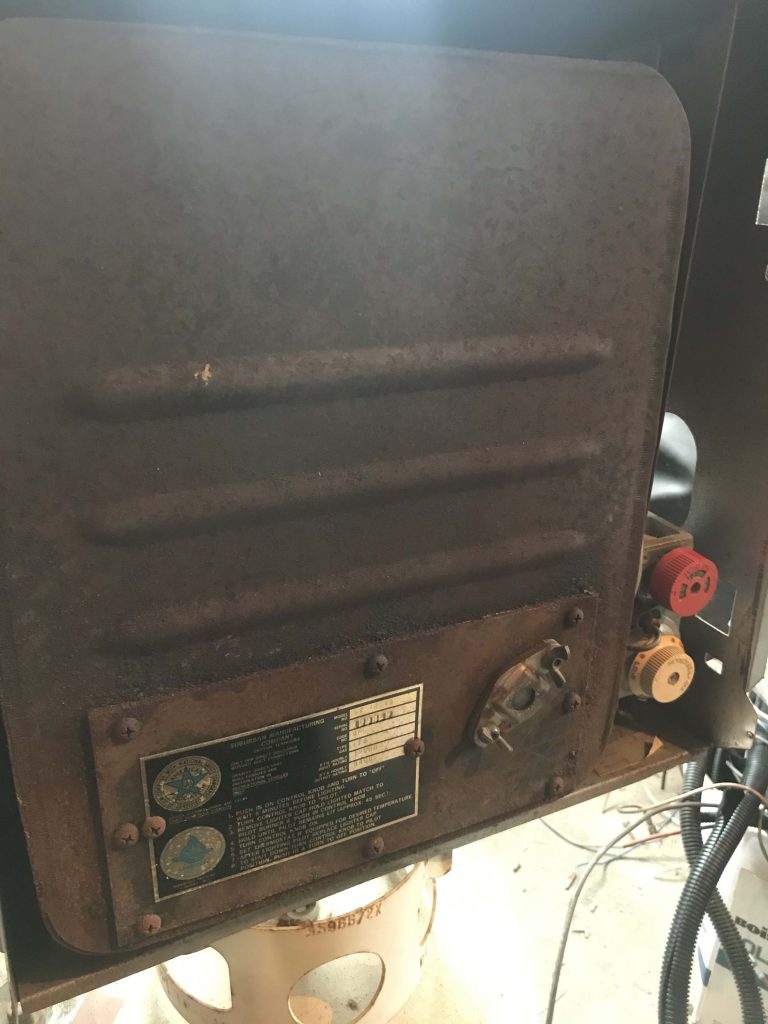
So I fired it up.
It threw off some heat. But I noticed that as much heat shot out of the exhaust vent than came out of the heating plate. The idea that all that heat vamoosed into the cold outdoors offended my frugal sensibilities.
I thought, “What if I build a heat exchanger?”
It’ll be green! (Not the color…environmentally responsible, I mean.) Julie will be warmer. It’ll be a cool piece of engineering that will wow all my friends.
Not bad for an English teacher.
Well, it didn’t turn out that way. But I’ll tell you the story anyway. Perhaps some of you science geeks out there can give me some ideas to salvage the project.
Heat Exchanger Design
The basic idea is that when you have energy in different amounts, it wants to equalize. So if you have cold and hot together, they want to mingle. (Something like that, I think.)
Plus, I had stuff from the skoolie conversion project that I thought, “Man, I should use this somehow.” Like the heaters, which contained radiators and fans. And a water pump to push radiator fluid through the heaters. How cool would it be to MacGyver some sort of useful apparatus?
I thought I would get some three-inch furnace pipe and extend a chimney up through the bus then either out the roof or out the side. I would wrap copper tubing around the galvanized chimney.
Then, I could use the salvaged pump to move fluid through the tubing and into the radiator.

The fluid would absorb heat from the chimney and flow into the radiator. With a flip of a switch, I could turn on the radiator fan and, voila! Heat!
Perfect! I’d be a genius and Julie would wear fewer clothes.
The Execution of the Plan
Materials

I bought
- â…œ” copper tubing
- 3″ galvanized furnace pipe
- Various flare fittings to connect the copper tubing to the 1″ coolant lines
Process
I clicked the galvanized furnace pipe together. (not a super-easy task: you have to bend the edges together so that they meet at the proper angle, push them together, then bend the pipe bak again so that it’s round.)
Wrapping the tubing
To keep the copper from crimping when I wrapped it around the furnace pipe, I filled it with water. (Water does not compress). Since it was winter here and about 12 degrees Fahrenheit, doing this outside wasn’t really an option.

So I commandeered the bathtub. I filled it with water and worked the copper coil around in it to try to get the air bubbles out. In an ideal scenario, you would get a siphon going to get all the air out, which I couldn’t do on the bathtub. I think I got most of it out, but I’m sure it could have been better.
After doing my best to burp the tubing, I took a pair of bolt cutters and crimped each end or the tubing about an inch in from the end. Then I took a hot glue gun and added a glob of glue to each end, then crimped the very end of both sides. This, I hoped, would seal the water in the tubing and maintain the pressure necessary.

Then back to the shop for wrapping.
Immediately I realized that the force required to bend water-filled copper tubing would dent furnace pipe. These dents, in turn, would allow the copper tubing to conform to the dents and crimp.
So I went back to the hardware store and bought a section of 3 inch schedule-40 pipe.
Hah! Let’s see the tubing bend that!
I used a hole saw to drill some 3″ holes in some scrap wood, screwed them to the work table, inserted the pipe as a makeshift vice, and started wrapping.
It went well! I made a pretty looking copper coil.
I removed the coil from the schedule-40 pipe, placed it on the furnace pipe and realized my first significant error: 3″ PVC pipe is bigger than 3″ furnace pipe.
Grrr.
I should have checked that first.
As a carpenter, I know that a 2×4 is really 1 1/2 x 3 1/2. And that 1/2 inch plywood is really 19/32 and 3/4 is 23/32. But I’m not a plumber. So I should have checked.
I was pretty sure that a 1/4″ gap between the tubing and the furnace pipe would not allow for good heat exchange.
So now the problem faced me of re-wrapping the tubing.
I built a “galvanized-furnace-pipe-support-system.” Essentially a 6 foot cross of 19/32 plywood that I hoped would provide enough support for bending.

The problem was, I couldn’t get the pipe perfectly round. These slight irregularities allowed the copper tubing to crimp and distort. I managed to get it wrapped to some degree but it distorted in places.
I had another shorter section of tubing kicking around the shop, so I filled it with water and wrapped it. It worked pretty well since it had not been wrapped already, but it still wasn’t perfect.
Assembling the Heat Exchanger
Cabinet
In order to house all the components in proximity, I needed some sort of cabinet. So I ripped down a couple of 2×4’s (1 1/2 x 3 1/2’s), cut some plywood shelved and put the whole thing together.

I put the furnace on top and the radiator on the bottom, the idea being that the blown air would rise.
Plumbing
Next, I began connecting all the pipes. Even though my first coil had some kinks, when I clipped the ends and drained the water, I could blow air through it. I thought that if air could move through, so could water.
However, when I tried to get a flare nut on the ends, the tubing had distorted enough that it wouldn’t go on.

I think there was some profanity at this point. Let me re-phrase that: there was some profanity at this point.
“Well,” I figured, “I had come this far, I might as well test the design with the shorter section of tubing to see how much heat I could gather.
So I put the flare nuts on the shorter coil and dropped the coil over the furnace pipe.
I put adapters and plastic barbed fitting on the adaptors then cut the hoses that I had removed from the bus to size.
I decided to go from the bottom of the coil into the radiator, out of the radiator into the pump, and out of the pump and into the top of the coil.
I hooked the hose up to the radiator, then used a garden hose (hooked up inside in my basement) to fill up the radiator, then clamped that hose to the coil.
Similarly, I filled the hose to the pump with water, connected it, then filled the hose from the pump to the coil with water, (and the coil) and made the final connection.
Everything was ready.
Testing the Heat Exchanger
I moved the whole kit and kaboodle outside so I wouldn’t die of carbon monoxide poisoning, and fired up the furnace. I hooked up the wires from the pump to an extra car battery I keep around the shop. I could hear and feel fluid moving around.
I waited optimistically.
After five minutes, my laser thermometer read 440 degrees on the heat plate of the furnace, but only read 50 degrees on the copper coil. Which seemed about right when I touched the coil with my hand. (I didn’t touch the heat plate. I’m en English teacher but not that dumb). For some reason, my thermometer wouldn’t read the furnace pipe itself, but it was too hot to touch above the coil.
Clearly, the coil was not absorbing enough heat. So I turned off the pump.

I waited about 20 minutes.
Brought in a load of firewood.
Shoveled some snow off the roof of the bus.
When I returned, the coil was warm to the touch, so I turned the pump back on.
Within a few seconds, the coil felt cool again.
I repeated this process a few times to try and get all of the fluid warm, but to no avail.
It seemed that the radiator cooled the fluid too much for the system to be effective as a heater.
It would work great as a flu cooler but not as a Julie heater.
Conclusions
I pose several hypotheses for the shortfalls of this system
- The volume of the fluid in the coil is too small. Can’t keep up with the radiator
- The length of the coil is too short. Fluid spends too much time in the radiator
- I’m currently in ill-favor with the heat exchanger gods.
I’m not completely ready to abandon the project. I think with some modifications (and helpful suggestions) that it could work.
I definitely think that I need to extend the coil.
But I am loathe to spend another $50 on copper tubing that might make it work.
So I’m taking a break.
Moving on to other projects for the time being.
If you have any ideas, Please share them in the comments. I can still use just the furnace for now, but still think the heat exchanger would be cool. So let the suggestions fly!
Perhaps your support will put me more in favor with the heat exchanger gods.
But I’m still glad I tried. It seems that the real magic of skoolie conversion comes from the trials and tribulations of the DIY process. The learning, the growth, and the exchange of ideas on forums and social media is imbedded in the fabric of the process.
If we wanted a pre-fab experience, we would have bought an RV.