
Time to build some Skoolie bifold closet doors.
These doors will serve two functions:
- Keep stuff from reaching orbit when we drive over our loosely termed as a “road” when we head to our summer spot for the bus
- Hide said stuff from view since I am a great “thrower of things.”
A Background Story
If I may, I’ll indulge in a background story…kind of related.
For two summers I worked as a Shakespearean actor.
Yup”¦”We few, we happy few, we band of brothers”¦” and all that.
So I can put “Professional Actor” on my resume. (Even though my paycheck wouldn”™t even cover gas for my Chevy Z71 at the time.
Anyhoo”¦
It was a pretty cool community. Many actors lived right next to the theater and, at night, fellow actors would offer workshops in areas of their expertise.
One night, Josh, our fight captain, ran a stage combat workshop on “Found Weapons.”
He taught us some basic stage combat concepts, then grabbed random props from the prop room.
He broke us into partners. We had to come up with a scene where we created a fight scene in the context of the props. Two cooks in the kitchen fought over what ingredients would go in the sauce”¦.and used kitchen elements, creatively of course, as weapons. Two old ladies fought over a desired item at a yard sale.
It was hilarious…and fun!
I feel like this on the bus quite often. Using “Found” materials I”™m working to try to create a tiny home on wheels.
Why spend extra money on materials when they might be lying around?
This turned into one of those projects!
Building Bifold Doors for the Skoolie
Normal doors, because of their width, protrude out into the space too much. And pocket doors require wall space in the side to slide the door into. Bifold doors fold in half, so take up significantly less space when opened into the room.
To Louvre or Not to Louvre
Louvred doors are great for air flow. The angled slats block the view to the inevitable mess that I toss into the closet. However, they also allow air to circulate and cut down on the risk of mold and musty smelling towels.
But a louvred door like this one costs over $100. I was sure I could make one for less.
Found Materials for the Skoolie Bifold Door
So what did I have on hand?
Still some oak left. (Thank goodness for this now dwindling but long-lasting pile of rough sawn oak!
But it was all 1″ thick.
I didn”™t have any smaller stock for the slats and I didn”™t want to resaw the oak.
Raised panels would look nice, but they wouldn”™t breathe as well.
However, I had some of the perforated ceiling panels kicking around. Hmmmm…I could paint them flat black, cut them into size and screw them into oak frames.
Eureka!
Milling Lumber for the Skoolie Bifold Door Frames
I needed rails and stiles for the frame, so I cut them to rough lengths on the miter saw, then flattened two sides with the jointer.
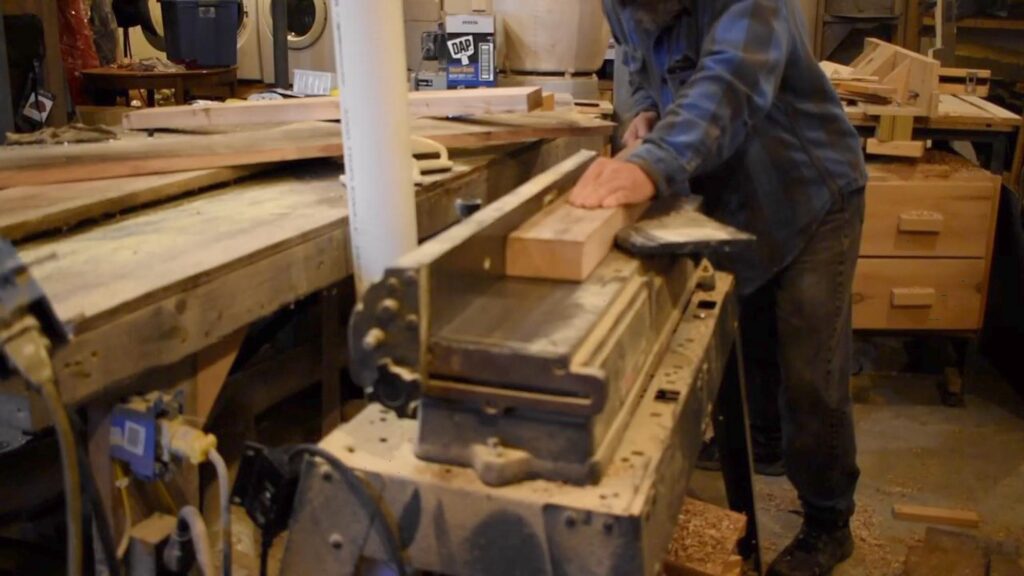
Next, I cut them to width on the table saw.
Finally I flattened the fourth side with the planer. I didn”™t worry about getting the stock down to an exact thickness. Just enough to “make pretty,” which came out to be about 13/16ths.
Cutting to Exact Length
I went back to the miter saw, and with one of my favorite time saving tricks, jigged out all the cuts.
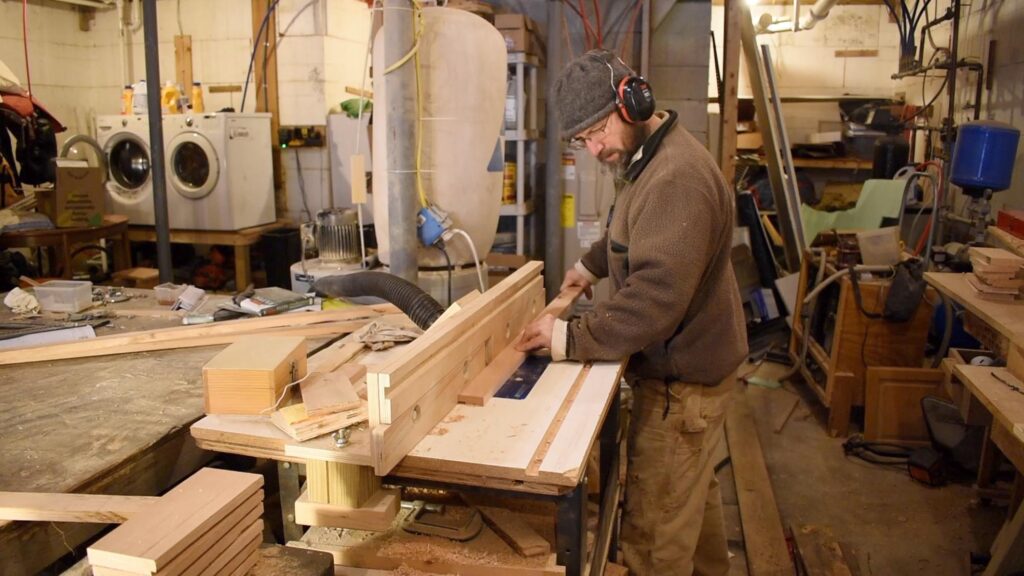
Grooves or Rabets in the Skoolie Closet Door Frame?
I considered using my router table and cabinet door router bit set to finish milling out the frame. However, I don”™t have a metal brake, so I didn”™t have an effective way to fold over the ceiling panel edges to thicken them enough to fit into a groove.
Instead, I opted to use a straight bit and cut a rabet ½” wide and ¼” deep onto the inside edges of the frame.
I did this in two passes (¼” each) so that the ¾ bit would only cut on the front edge and make a cleaner cut.
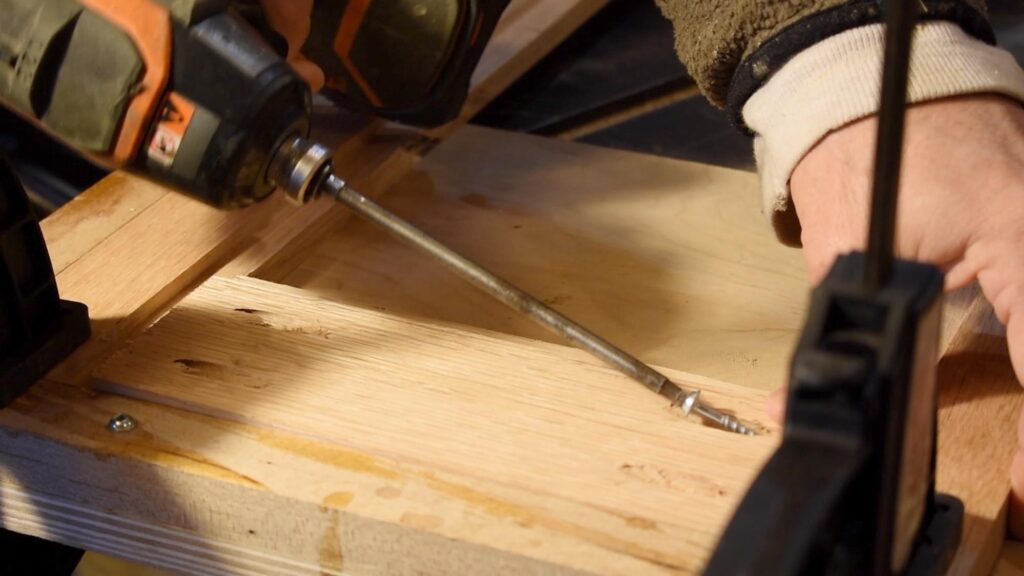
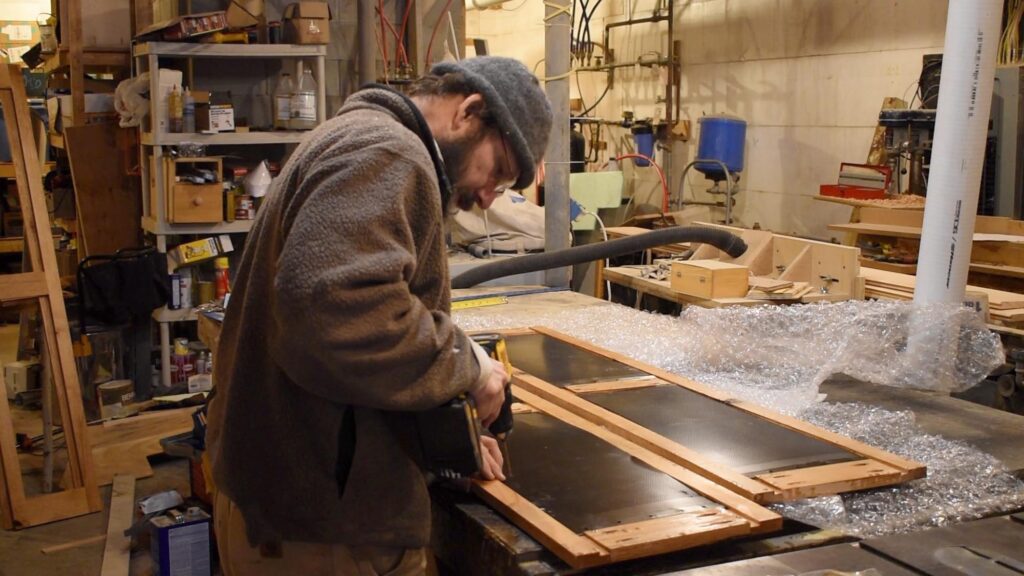
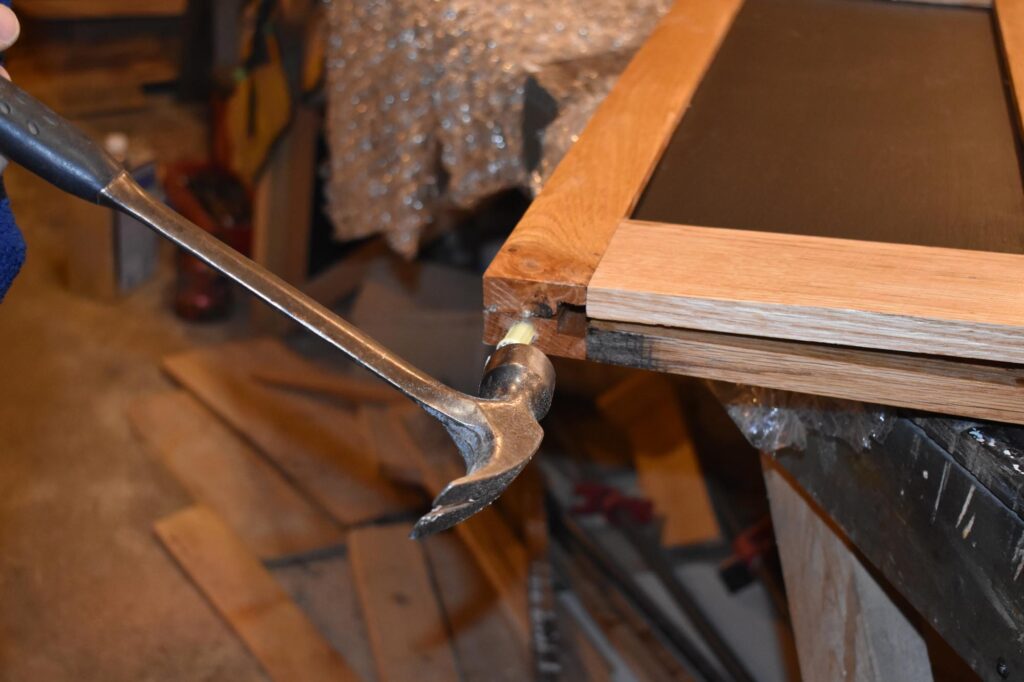
Joining the Skoolie Closet Door Frame
Using my Kreg Jig, I drilled pocket holes at the end of each rail.
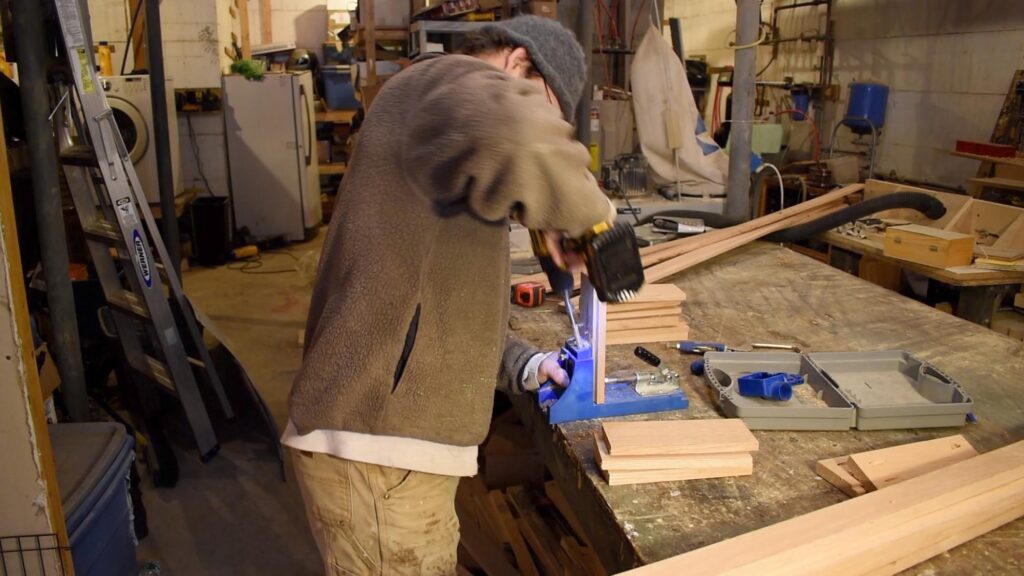
Then, after adding glue to the rail ends and clamping the frame together, I secured the whole kit and kaboodle with pocket screws.
Sanding and Polyurethane
I sanded the frames with 80, then 120 grit sandpaper. Next, I wiped them down with a damp cloth. This step not only cleans up some sawdust but it also “raises the grain.” (The moisture makes the wood fibers “stand up” a bit.) Thus, the final sanding with 220 grit wears away these fibers leaving a silky smooth finish.
I treated the frames with two coats of an oil-based polyurethane.
Skoolie Closet Door Panels
With my electric shears I cut the perforated bus ceiling material to size, then spray painted it with some black Rustoleum matte finish.
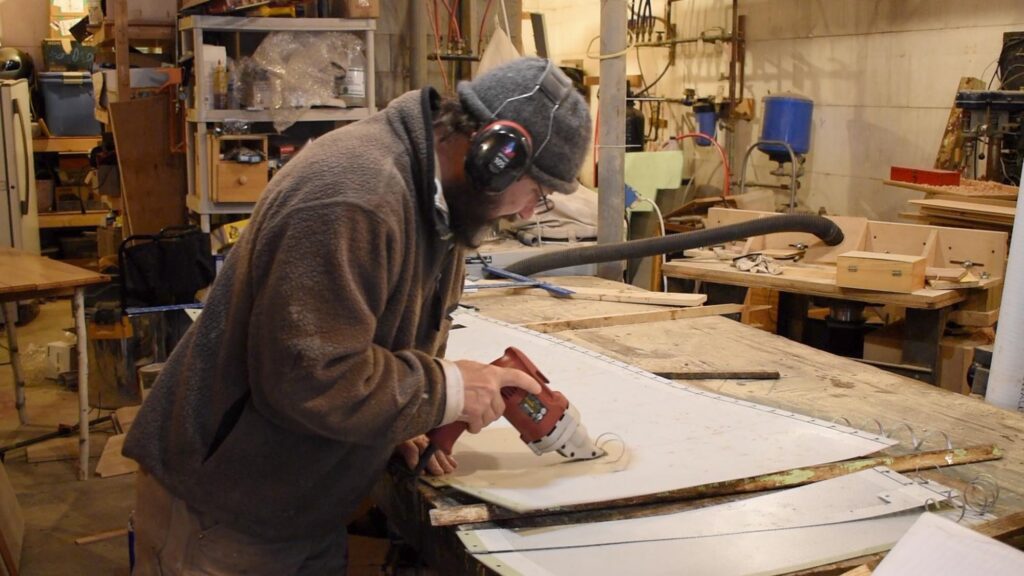
After it had dried, I pre-drilled holes into both the ceiling material and the frames and screwed them into the panels with some â…œ” wood screws.
Installing the Bifold Door Hardware
Here”™s where I made some tactical errors and had to adapt.
The bifold door hardware kit comes with hinges, the sliding track, the pivot pins (top and bottom) and a floor support bracket.
With 2″ rails for the frame held together with Kreg screws, I didn”™t give myself enough material to drill holes for the pivot pins without running into the kreg screws. I could have avoided this by using 3″ for the rails which would have pushed the kreg screws farther to the inside and leaving me more room at the end for the pivot pin holes.
Since I had glued and screwed the frame together, I just took out the bottom screw. The glue and the one screw should be enough to hold the door together.
Hinges
The hinges come with a wide and a narrow side. The wide side screws to the edge of the door that”™s anchored and pivots. The narrow edge of the hinge screws to the door that slides along the track.
I laid the hinges on edge of the door (edge facing up) and used a centering drill bit to start the screw holes. Then, with my impact driver, I screwed in the screws.
After attaching the hinges to one door, I lined up the other door and repeated the process
Pins
Next, I drilled pilot holes 2″ from the end on both the bottom and the top of the pivot door, and just in the top of the sliding door. I drilled the pilot hole with a â…›” bit. This made a “guide” hole. I widened the guide hole with a 7/16″ bit.
If I had started with a 7/16″ bit, I would have run more of a risk sliding off the center of the rail. The smaller bit for the pilot hole was easier to control.
After drilling the holes I used a hammer to tap in the pivot pin in the top hole of the pivot door, the track wheel pin in the top of the sliding door, and the base pin in the bottom of the pivot door.
Handle
I drilled a hole dead center of the middle frame rail, inserted the screw through the hole, and used my impact driver to screw it into the wooden knob.
Track and Base Plate
Because of the angle of the ceiling I had to cut a bevel in the 2×2 that I used as a header. I used my angle finder tool to find the rough angle, then cut a few pieces of scrap until I found one that allowed me to push the header up against the ceiling but have the bottom parallel to the floor.
Next, I screwed it to the door jambs with Kreg screws.
To cut the metal track down to 25 ¾”, so, with a fine toothed metal blade in my sawzall, I cut the track down to size.
Placing it about a half inch away from the outside edge of the closet header and screwed it in with the pivot pin bracket to the right. (The way I wanted the door to swing.)
I screwed the base plate to the floor and the jamb also ½” from the outside edge of the closet.
Installing the Skoolie Bifold Door
To install the door I pushed the spring-loaded pivot pin in the top of the door into the pivot bracket in the track, then lowered the lower pin into the bottom pivot bracket.
Pushing down the wheel guide pin, I slid the folding door under the track and released the guide wheel into the track.
Skoolie Bifold Closet Door Conclusion
I’m most happy that I built two doors for $30 in hardware. Everything else I repurposed from material I already had.
The hinges narrowly fit on the 13/16″ stock. I wish I would have had some 1″ stock around for the frames. But I think they will work.
I’m curious to see how much I will need to devise some way of keeping them closed while rolling down the road.
I’ll keep you posted!
As always, thanks for following along. Feel free to ask questions at any time!
All the Best,
Ted