
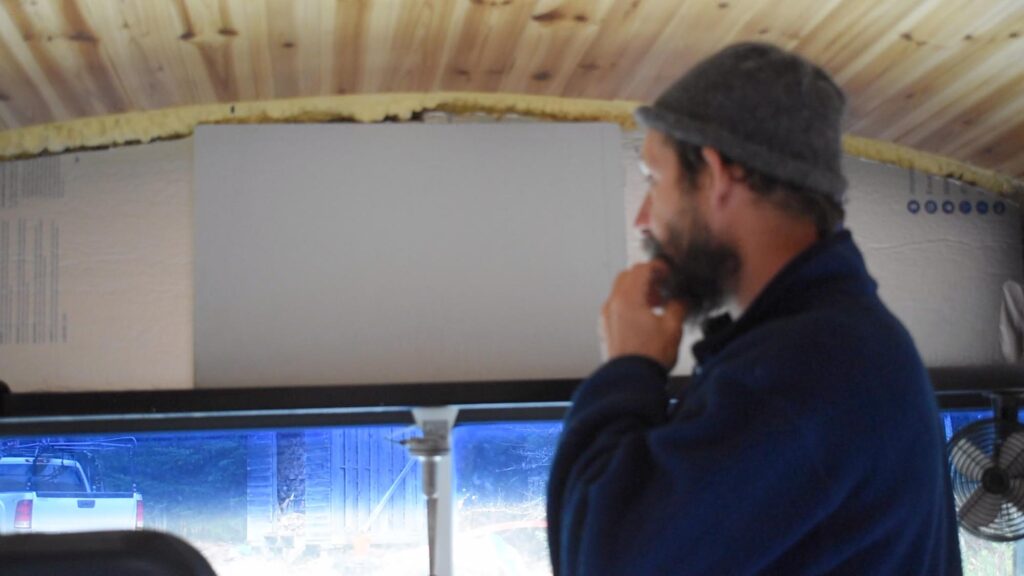
I’m not exactly sure why they call it a “bulkhead.” But I wanted to rebuild the “Skoolie bulkhead:” the area above the windshield. (I haven’t gotten to the rear one yet!)
It once housed the school bus warning flasher lights, a place to stash a med kit, and enough dust to choke a water buffalo.
We wanted something rustic looking and somewhat functional. I mean, Skoolie owners everywhere seem to search for the Holy Grail of space. However, I feel like we have adequate storage space so far, but it’s nice to have more.
The trick will be can we avoid having it turn into a catch-all to throw all kinds of junk?
The question remains unanswered. (However, we’ve made it 1.5 days without filling it with crap.)
Skoolie Bulkhead Deconstruction
Last fall I ripped that puppy down with an impact driver and some wire cutters. I cut the wires to all the lights.
Then as a safety measure I started the bus and checked all the electric things (like lights, horn, windshield washers, etc) just to make sure that I didn’t sever any mystery wire to render the bus non-functional. I highly recommend this strategy when dealing with anything electrical on the bus.
I saved the metal bulkhead pieces because
- I’m a packrat. (NOT a hoarder…a packrat…there’s a difference!)
- They might come in handy as metal to sell at a recycling place, metal to repurpose, or as a pattern for matching the curve of the roof.
Insulating the Skoolie Bulkhead
We insulated the walls of the bus with two layers of 1″ foam. I had most of a sheet of foil-lined EPS, so I cut pieces to fit in the space, then “glued” them up and sealed all the gaps with a can of Great Stuff spray foam.
The cavities off to the side seemed pretty big to fill with spray foam, so I lightly stuffed some rockwool insulation in there.
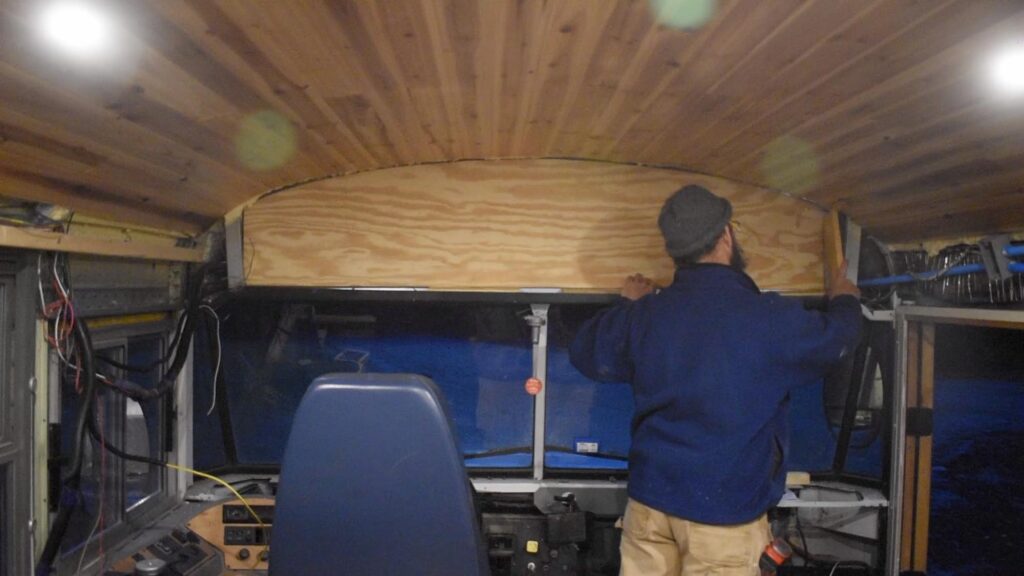
Skoolie Bulkhead Construction
Plywood Backing
I scribed the curve of the roof onto a piece of cardboard, checked for fit, then traced the cardboard onto a sheet of 7/16th sanded plywood. After cutting out the shape, I wedged it into place over the insulation.
Covering the Wings
I have no idea what to really call these parts, but about 8 inches from the side of the bus extend two metal studs that extend from the rib at the roof to the shelf that extends along the top of the windshield.
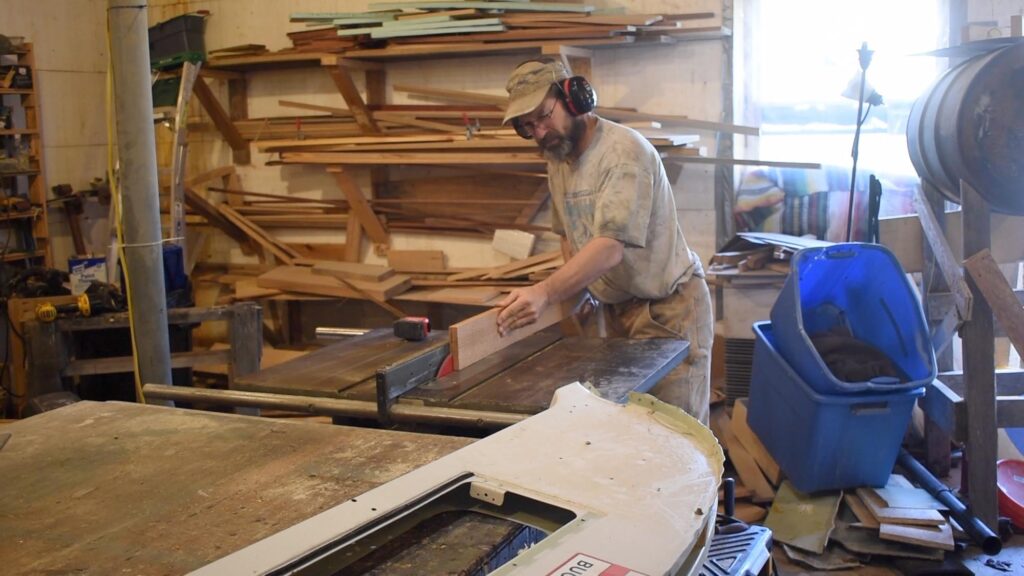
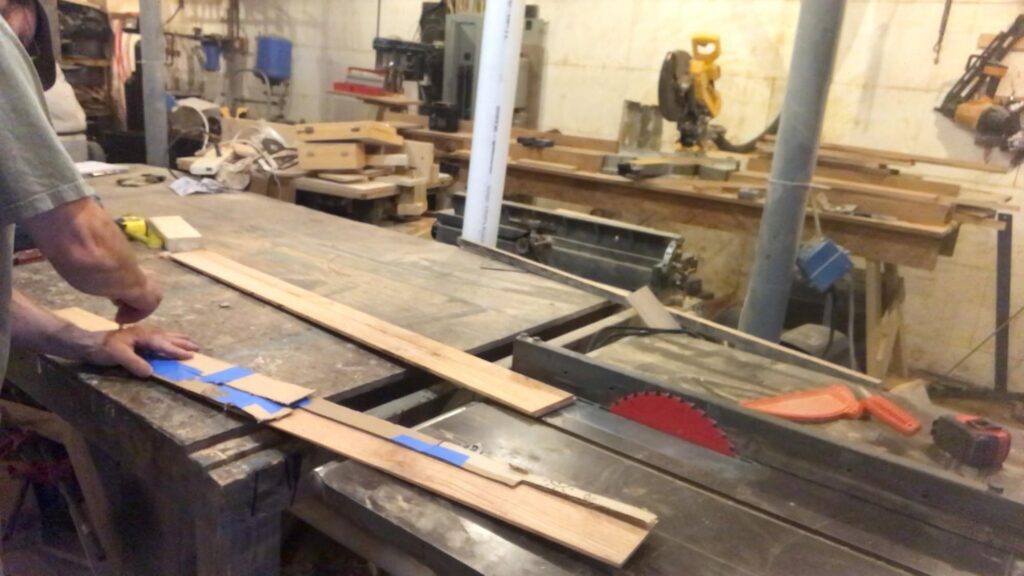
I traced the curve of the shelf near the sides of the door onto a couple of pieces of 3/4″ oak. Using my jigsaw I cut them out, then softened the edges with a bullnose bit on my router table.
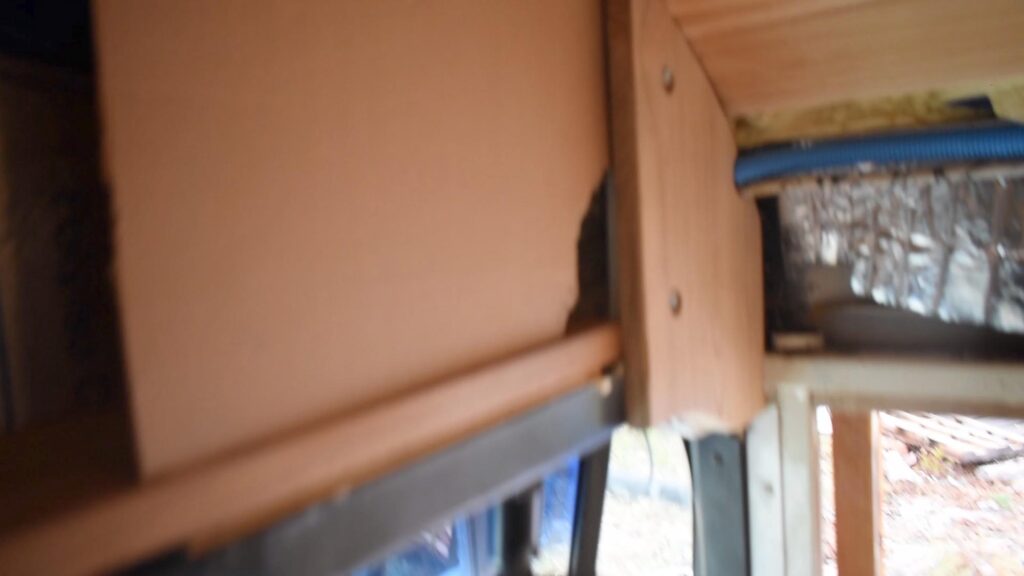
I also pre-drilled a countersink hole and a bolt hole in these pieces to fit a self-tapping bolt that would affix these wooden pieces to the metal strut.
With my impact driver I bolted them in place.
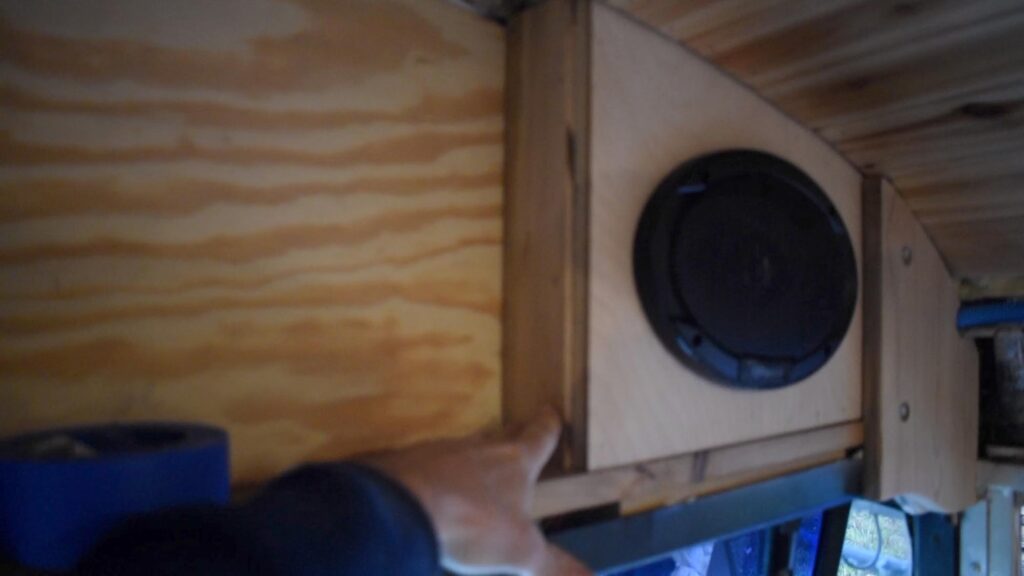
Installing New Speakers
Speaker History
During the deconstruction phase I saved the stock speakers from the ceiling. I built some temporary boxes for these speakers and hooked them up so I could rock the tunes while working and rattling down the road on our “mid-build” trips.
They…worked. (That’s Newspeak for “sounded awful.”) At least there was music.
But it was time for some new speakers, so I ordered some moderately priced 6×9 Kenwood car speakers. So I needed to rebuild some boxes.
First, I needed a base level that would serve as the shelf.
Wire Chases
I wanted a space to run wires. So I cut a groove in a couple of 2×4 scraps and laid them into the cavity of the metal running the speaker wires into the groove. Then I put cut a piece of pine to the right dimensions, set it on top of the 2×4 blocks and used my finish nailer to secure it in place. (This also helped anchor the bottom of the plywood in place.)
Speaker Boxes
Next, I measured the distance between the plywood and the outside of the shelf and the distance between the shelf and the roof, then cut a piece of 3/4″ oak to that size.
I also used my Kreg Jig to cut pocket holes on the inside edge.
I decided to use a few scraps of 3/4″ oak plywood that I had kicking around (packrat scores again!) to mount the speakers to, and a couple of scraps of 3/4″ oak left over from the cabinet build for the sides.
Once again I scribed the roof profile onto cardboard, tested the fit, traced the pattern onto the plywood and cut it out with a jigsaw.
Setting it on the shelf I marked where the side piece would land and marked the plywood with a pencil. Then using the square driver that came with my Kreg Jig, I secured the side piece to the back plywood using coarse pocket screws.
I cut a piece of scrap wood that would be hidden on the inside (behind the “wing” piece) and inserted them into the cavity just to keep the rockwool in place, then nailed it and the front plywood piece with 2″ finish nails.
The Electrical Work
With the boxes in place, I hooked up the speakers. I prefer soldering to crimping when possible. However, my home made soldering clamp broke, and I struggled holding the wires in place, so out came my crimping tool and butt connectors.
I matched up the wires, crimped them, then attached the speakers with the screws that came with them.
Fire those Puppies Up!
(So my brother-in-law, Mark, emailed me this morning to say he had just bought a 14″ band saw. Cool! Then, in the email thread with my other brother-in-law, asked about the stability of the wheels. Mark replied that he didn’t know yet because he hadn’t cut anything with it yet.
NOT CUT ANYTHING YET?!?? I would have barely had that thing out of the box before I had sawdust flying!)
Yeah, I’m not patient. As soon as those wires were connected I cranked up the tunes!
Kenwood Speaker “Review”
They are a massive improvement from the bus speakers! They produce a warm, clean sound without distorting. (Not that I have a very powerful radio). Nor do I have a subwoofer, however, so there’s not a real low end “thump,” but definitely a low end response. And, to be fair, my music tastes don’t really include club low end thumping!
My only “concern” is that they seem to be pretty mid heavy…there’s a mud in the midrange that I tackled by turning up the high end on the radio EQ. That seemed to balance the sound a bit more to my liking.
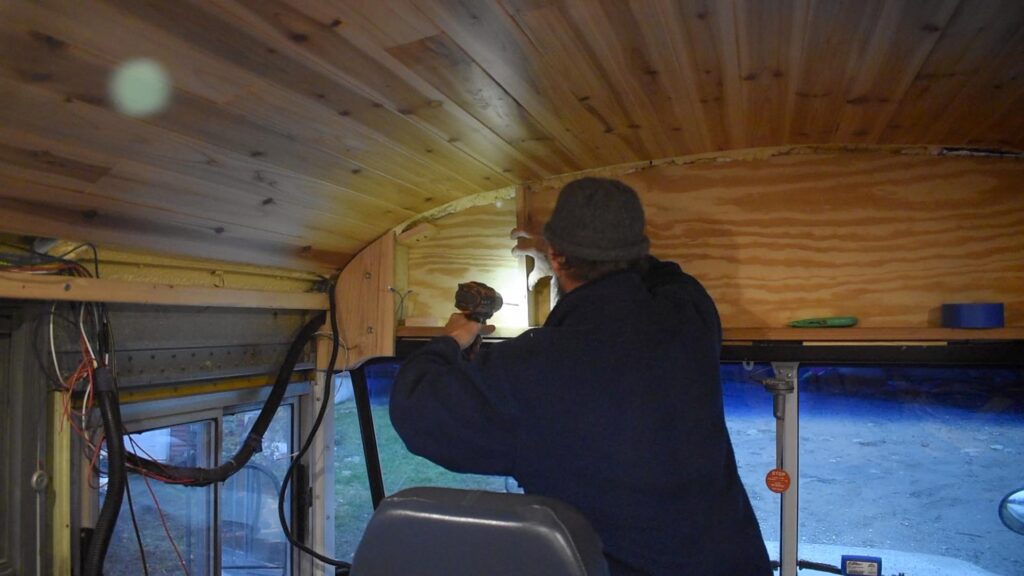
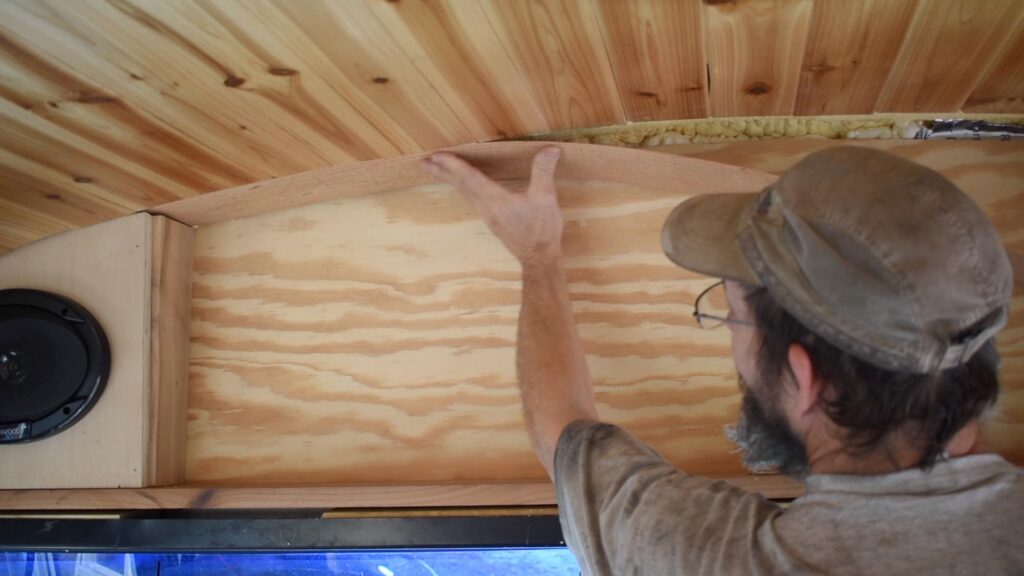
Dealing with the Curved Ceiling
I originally thought of using the metal bulkhead pieces that I took out as wood bending forms. Using some 2×4 scraps a screwed the back and bulkhead metal pieces together. I thought that I would rip some oak down to 1/8″ thick pieces, then glue and clamp them to this form to create a curved piece.
When I ripped the pieces, however, it looked like they were the right thickness. One piece would fit into the space and cover up the rib and spray foam insulation and nearly match the thickness of the tongue and groove cedar.
So I abandoned the form idea.
However, I thought that gluing up a laminate curve would provide enough stiffness to hold shape. One layer did not.
So instead, I pre-drilled countersink holes for screw heads and smaller holes within the countersink holes for screw shafts. Then, after pre-drilling holes in the bus rib, I screwed the 1/8″ piece of oak to the ceiling.
Skoolie Bulkhead Front Fence
If anyone has traveled in a moving school bus they know that stuff goes FLYING if not secured! And I’m the type of person that wants to get going when it’s time to get going and not want to take hours to secure loose ends.
So we needed a fence to keep items in place up on the shelf.
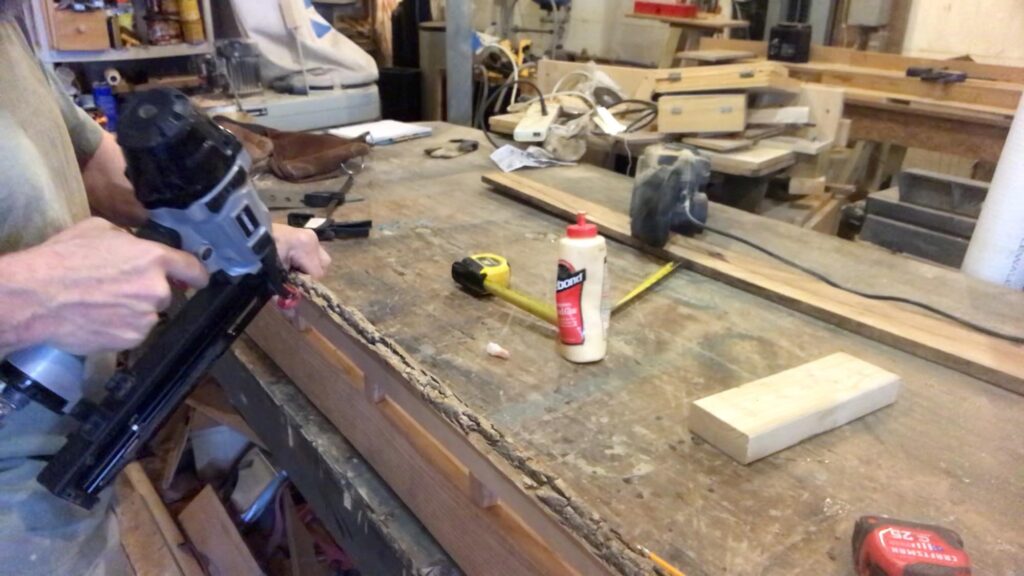
I cut a length of 1×4 oak that would fit in between the “wings” and cover the front edge of the shelf and the metal below it. In the middle and 16″ to to each side of the middle I glued and finish nailed a small block of oak 3/4″ thick and 1″ high. On top of these blocks I glued and finish nailed a 1 1/2″ (approximately!) piece of live edge that extended out to and overlapped the speaker boxes about 1 1/2″ on both sides.
Using a finish nailer and 2″ finish nails I nailed it in place.
Skoolie Bulkhead Trim
Now came the tricky part of covering gaps and screw heads with trim.
First, I wanted a piece to travel along the front edge to cover the gap between the tongue and groove cedar on the ceiling and the speaker boxes and the screws that held the curved piece of oak to the ceiling rib.
Templates
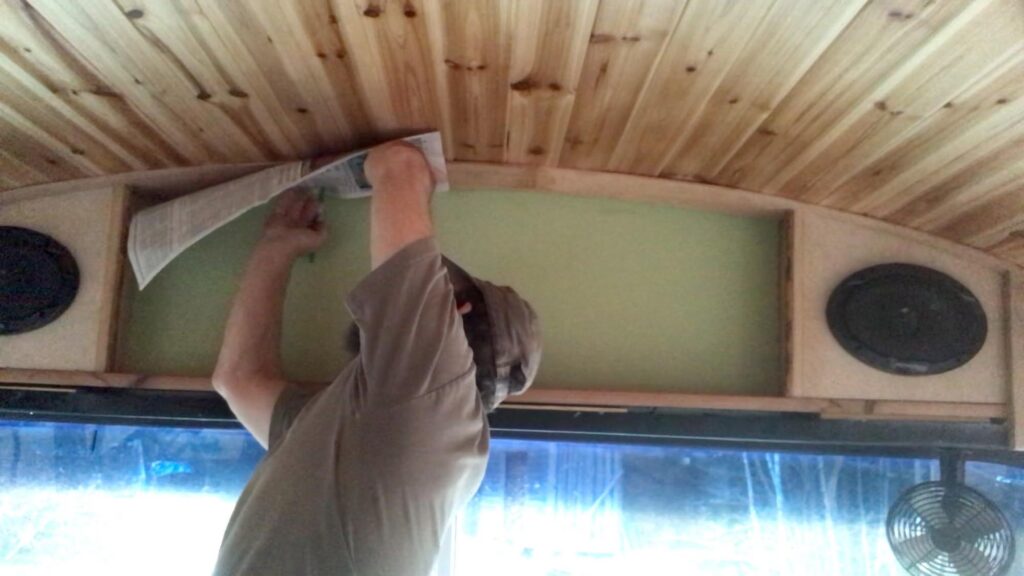
I taped a piece of cardboard to the ceiling and marked the indents around the “wing” pieces, the speaker box and the shelf area. Next, I measured the distance of each little jog, then forced my brain to take on this spatial challenge! I marked each distance on the cardboard, then cut it out (again trying to picture how the lines would transfer into a shape.
With the shape cut out, I checked the fit. VICTORY…it fit!!
I performed a little dance, then traced the cardboard into another piece of 1/8 ” oak. Using a jigsaw, (and a drill at one point) I cut out the shape then used a brad nailer to secure it in place.
Then I had to repeat the process for the other side. (I didn’t have a piece long enough to span the entire length. Besides, I often find it’s easier to get smaller pieces to fit rather than trying to get ALL of those cuts to match up to each other.
With the front trimmed out I moved to the back. I had a gap between the first curved piece that I screwed to the ceiling rib and the back of the plywood. (Oh, and by the way, I had painted the plywood. I thought some color would help create a contrasting accent to all the wood in the bus. Nor sure if I’m completely happy with the color yet!)
Even More Trim!
Because of a variance in the way that the plywood rested against the exterior metal of the skoolie bulkhead, the distance measured almost 2 inches at one end, an inch in the middle and an 1 1/2″ at the other end.
To match these discrepancies I once again employed the template strategy. I held up a piece of newspaper into the gap, pressed it against the edge of the front trip, and traced that line with a sharpie marker. I used an exacto knife to cut out the shape, traced it on another piece of 1/8 ” oak, cut it out, and brad nailed it in place.
To add one more layer of detail, I ripped one final strip of 1/2″ oak down to 1/2″ and brad nailed pieces of it all around the top of the inside edge of the shelf area.
Final Trim Pieces
To cover the screw holes holding the wings on, I cut two pieces of 1 1/2 x 8″ oak. Using an ogee bit on my router table I cut some edge detail. (Always do the end grain first…you’ll get tear out but then can smooth it over with the edge cut”¦.).
After a quick hand sand with some 220 grit, I once again used my finish nailer to fix them in place.
Skoolie Bulkhead Finish
I usually prefer shellac as a finish. It dries and cleans up a lot like a water-based finish, but brings out the warmth of the wood like an oil-based finish. However, I was out of shellac and had an open can of water-based polyurethane, so I brushed two coats of that over everything including the life edge.
Skoolie Bulkhead Conclusion
Overall I’m really happy with the way the bulkhead came out. The combination of the wood and the paint (though I may still change the color) creates an attractive texture. And the live edge accents add to the “woodsy” theme of our build.
I have to admit, I spent considerable time just staring at the space trying to figure out what I could nail / screw to what and how I could trim it all out to cover the gaps. Once again I found it impossible to see the entire project in my head and had to attack it one or two pieces at a time.
At one point, I considered using the metal bulkhead pieces that I had removed as a form for bending wood. Using some 2×4 scraps I screwed the front and back pieces together. I thought I would glue and clamp multiple pieces of 1/2″ oak to it to create a curved piece that would fit into the ceiling.
However I found that I really only needed one piece to match the thickness of the tongue and groove cedar on the ceiling, so I abandoned that plan. It occurred to me, though, that these bulkhead pieces make great templates for tracing the contour of the ceiling!
I hope this article helps you begin to figure out how you might rebuild these tricky areas of your skoolie conversion! Feel free to post questions!
All the best…
Ted